Self-built accessories

Wenn man es genau auf die Vorderkante macht, passt es nicht mit der Heckklappe, nehme ich an?

Aber sieht trotzdem schon Top aus!
 
@Milan wenn du damit fertig bist, dann bau uns bitte einen Frühlingsgenerator! Der Winter geht mir langsam auf den S**k.
 
  • Like
Reactions: ekm
So I would be in favor of a cross-model variant that also fits in the ROC. ☺️

It needs to be narrower
Design-wise, as always top-notch, but you are absolutely right...

I had previously assumed that the light was to be mounted under the parcel shelf, not at the front edge. Then it would matter less about the design and save weight, which should perhaps be considered regarding the opening/closing of the tailgate (?). Or under the parcel shelf at the rear edge? The underside of the shelf will probably also be "smooth" with you, so that a fastening with Velcro would be unnecessary (?). On the other hand... if screwed... how much does a parcel shelf cost..?

What does it look like at the upper edge of the rear seat (split!)? There is carpet - Velcro is suitable. The light should have a design but must be split. If you have a light on the left and right, it would be easy to draw power from both sides. If not... someone next door has retrofitted a second light, so power can be obtained there as well...

The side walls/wheel arches are likely to be so different that a universal solution will be difficult (except for a spot). Under the loading edge is too deep...

That leaves only the parcel shelf or rear seat... or remove the parcel shelf, then the headliner...

"Headliner" raises the next question: where is the lighting when you need storage space, remove the parcel shelf/the roller, and fold the rear seat forward?

Oh dear, I can already see it, two use cases, two lights? 🤣

A flexible light strip on both sides would have advantages: it adapts to the side wall, power from the existing light is available, Velcro is suitable, no weight on the parcel shelf, permanent lighting without having to unplug, in case the parcel shelf is removed or the rear seat is folded down.
 
Last edited:
Design has to be there, otherwise it’s no fun :p but sure, the simplest thing would be to clip a €12 under-shelf light under the parcel shelf, there are rechargeable ones with a battery that react to movement.

But we’re not here for simple :ROFLMAO:

By the way, a parcel shelf costs €150-200 for the hatch.
 
badge
 
@Milan

As already suggested, perhaps supply power via a magnetic connector?
So a Y-piece from the existing boot light to a magnetic connector on your construction?
 
I’m actually leaning back towards battery-powered lights again. Although I once learned how to solder and develop circuits, what’s much more important is: keep it simple (especially for unqualified personnel 😁)

That means: The lighting is done by relatively arbitrary battery-powered lights that can be attached magnetically/with Velcro/gum to the holder https://www.amazon.de/dp/B0CN2XLJWX?tag=cupra-21 The Cupra logo at the rear remains but is backed with red reflector film.

In any case, a big thank you to everyone who has participated so actively here – it’s really a lot of fun when you get immediate feedback!
 
Die nächste (leasingfreundliche) Blödsinnsidee hat ihren Anfang genommen.....

1771496097815.png + 1771496138984.png = 1771496220740.png

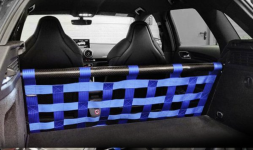
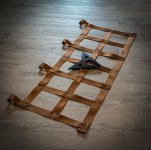
Natürlich nur also "Deko"-Umbau bzw. "Gepäcktrennnetz" und ohne Reglement-Erfüllungsanspruch... Nicht, dass unsere Forumsinterne Testfahrer- und Rennsportabteilung Schnappatmung bekommt :p
 
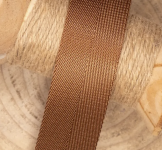
Sowas hatte ich mit der Version von deinem Feuerlöcherhalter als erstes im Kopf, dann kann nämlich (im ST) die Abdeckung und die Schiene für das Netz verbleiben. Also rechts und links den Halter und dann die Verbindungsstangen (als Clickaufnahme wie z. B. eine Version von Ikea für den Kleiderschrank) oben und unten.
 
@Milan
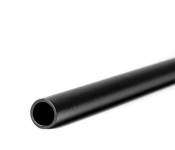
Sieht gut aus. 👍 Ist das Rohr aus Alu oder Kunststoff?
 
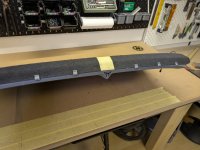
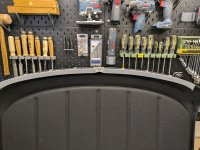
(nicht über die ganzen Blasen und Falten wundern, ich habe nur schnell ne Folie drauf geschmissen, damit das Teil schwarz ist und nicht hellgrau...)

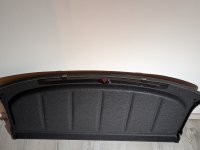
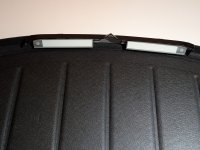
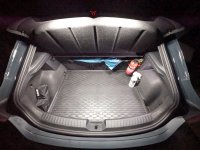
im ausgebauten Zustand:
PXL_20260219_181456296.PORTRAIT.jpgPXL_20260219_181513195.PORTRAIT.ORIGINAL.jpg

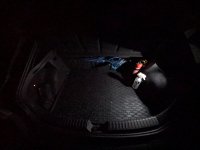
nur Originalfunzel (und das ist schon wohlwollend aufgehellt):
PXL_20260219_185701664.RAW-01.COVER.jpg

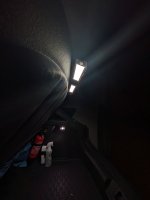
und mit Zusatzleuchten:
PXL_20260219_185717309.RAW-01.COVER.jpgPXL_20260219_185933942.RAW-01.MP.COVER.jpg

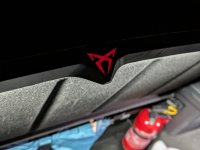
Das Cupra-Logo ist rot durchscheinend:
PXL_20260219_185743862.PORTRAIT.jpg

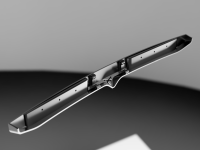
Hier als 3D-Konstruktion von hinten:
1771528323971.png


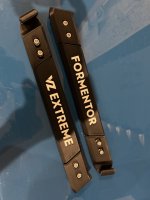
Der "Leuchtenhalter" ist 3-Teilig und kann verschraubt oder verklebt werden. Das Material wird ASA (ein besseres ABS) sein und damit beliebig schleif-, lackier oder beklebbar. auf den planen Flächen links und recht können universale Leuchten befestigt werden (Doppelseitiges Klebeband, Klettband, magnetisch wenn man vorher nen Stück Blech draufklebt...) Die Lampen die ich verwendet habe sind 21*4cm groß, Bewegungsgesteuert und dimmbar.

Die Druckzeit pro Halter beträgt 10 Stunden und braucht 180g Material. Falls jemand Interesse an dem Teil hat, wie immer gerne melden - vorneweg aber schonmal der Hinweis: ich werde die Teile nicht schleifen, lackieren oder folieren - das ist wirklich ein Riesen Aufwand, der mit meiner Freizeit nicht mehr zu vereinbaren ist. Kommt dann also als Bausatz mit einem Stück roter Folie für das Logo zu Euch - Lampen nicht enthalten


barrack-obama-obama-out.gif
Milan Out
 
Hört sich nach einer super Lösung an. 👍 Da ich meinen Kofferraum an 99 von 100 Tagen nicht benötige, und schon gar nicht im Dunklen, kommt eine zusätzliche Beleuchtung für mich nicht in Frage.
 
definitiv im ergebnis schön beleuchtet. Warum bekommen das die Hersteller nicht hin? das ist im Grunde nicht wirklich der entscheidende Kostenfaktor.

ich bin tatsächlich mindestens 1x pro woche am kofferraum, um.den Einkauf unterzubringen.
Daher interessant und ich habe auch schon überlegt eine zusätzliche Unterbauleuchte mit Akku per Klett zu befestigen.
 
Danke @Milan , wie immer tolle Arbeit von dir ;) freu mich schon auf das nächste Mal, denn ich bin mir sicher es wird passieren :D

P.S sorry das es mit dem auspacken gedauert hat, lieg mit ner fetten Mandelentzündung flach.
 

Attachments

  • IMG_0958.jpeg
    IMG_0958.jpeg
    2.6 MB · Views: 33

* = Advertisement
Links marked with an asterisk (*) are affiliate links. If you click on one of these links and make a purchase, we receive a commission from the respective online shop or provider. This does not affect the price you pay.

cupra.forum · Alle Rechte vorbehalten · Dies ist kein Forum der Seat Cupra S.A.U.
Back
Top