philimi
Kennt sich aus ★
Hey,
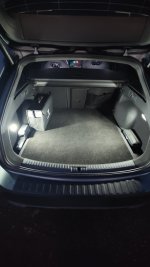
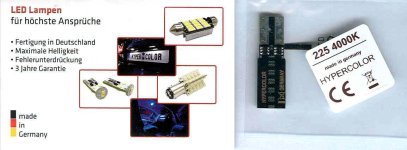
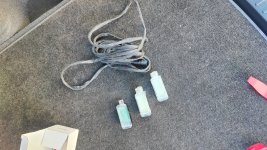
I’ve had my car for almost a month now – and especially during the dark season, you can never have too much light. That’s why I ordered a Y-cable (€11) and two replacement LEDs (€5) for the boot from AliExpress.
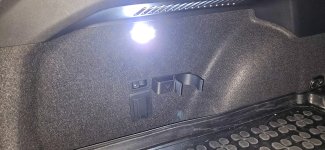
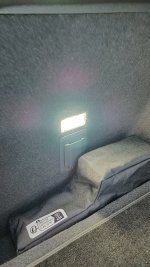
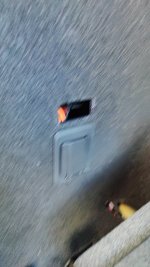
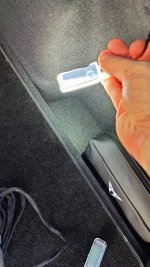
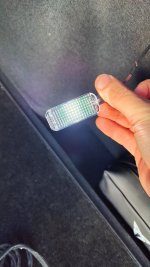
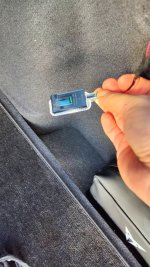
My plan: Remove the blank cover above the 12V socket, install an additional lamp there, and also replace the original light on the other side. Normally, that’s where the switch for the towbar sits. The blank cover was surprisingly difficult to remove because there’s a tight plastic tab at the front in the direction of travel that you have to push away. Mine got a bit bent in the process – not a big deal. The original lamp came out quite easily, though. I used a set of plastic levers as tools, which worked great.
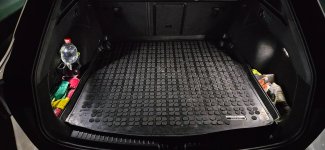
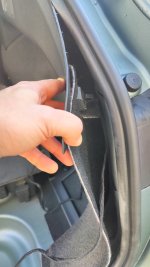
Then I pulled the large Styrofoam piece up from under the loading floor. It’s wedged in on the left and right sides in the e-Hybrid. Next, I pulled the loading edge up with a strong jerk – it’s only clipped in and held at the bottom by three metal bolts. After that, I removed the small Styrofoam pieces from the side pockets, and there was already enough space to lay the cable neatly.
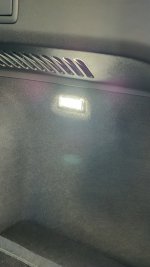
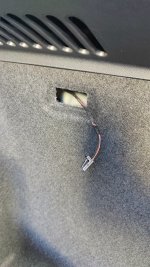
I first routed the cable through the opening on the driver’s side and carefully pulled it along the bumper to the other side – where the Styrofoam piece usually sits. On the passenger side, I ran it between the plastic trim and the carpet. If it gets stuck, a firm tug helps to briefly loosen the trim. Then I continued the cable until it reached the ventilation slots. From there, I could reach through the LED installation opening with one of the tools and pull it out.
Everything connected, reassembled – done.
(Sorry it was cold, some pictures are a bit shaky)
I’ve had my car for almost a month now – and especially during the dark season, you can never have too much light. That’s why I ordered a Y-cable (€11) and two replacement LEDs (€5) for the boot from AliExpress.
My plan: Remove the blank cover above the 12V socket, install an additional lamp there, and also replace the original light on the other side. Normally, that’s where the switch for the towbar sits. The blank cover was surprisingly difficult to remove because there’s a tight plastic tab at the front in the direction of travel that you have to push away. Mine got a bit bent in the process – not a big deal. The original lamp came out quite easily, though. I used a set of plastic levers as tools, which worked great.
Then I pulled the large Styrofoam piece up from under the loading floor. It’s wedged in on the left and right sides in the e-Hybrid. Next, I pulled the loading edge up with a strong jerk – it’s only clipped in and held at the bottom by three metal bolts. After that, I removed the small Styrofoam pieces from the side pockets, and there was already enough space to lay the cable neatly.
I first routed the cable through the opening on the driver’s side and carefully pulled it along the bumper to the other side – where the Styrofoam piece usually sits. On the passenger side, I ran it between the plastic trim and the carpet. If it gets stuck, a firm tug helps to briefly loosen the trim. Then I continued the cable until it reached the ventilation slots. From there, I could reach through the LED installation opening with one of the tools and pull it out.
Everything connected, reassembled – done.
(Sorry it was cold, some pictures are a bit shaky)
Attachments
-
 IMG20251121124314.jpg2.6 MB · Views: 52
-
 IMG20251121132306.jpg1.6 MB · Views: 50
-
 IMG20251121132301.jpg1 MB · Views: 48
-
 IMG20251121130714.jpg928.2 KB · Views: 46
-
 IMG20251121125955.jpg1.4 MB · Views: 49
-
 IMG20251121125951.jpg1.7 MB · Views: 46
-
 IMG20251121124345.jpg2.4 MB · Views: 47
-
 IMG20251121124333.jpg1.2 MB · Views: 45
-
 IMG20251121124331.jpg1.8 MB · Views: 50